Hey guys-
This is the second installment in my pottery series designed to show a glimpse into the world of making pottery via "throwing" on a wheel. Last time, I introduced the clay body and the first steps of the process (find my first post below if you need a refresher!)
Now that the pieces have been fired in an electric kiln, they are much more hardened and durable. The firing process in itself is interesting because it is a true test of the clay body. If the clay hasn't been wedged (kneaded) well enough and thrown correctly, too many little air pockets within the clay would cause it to just EXPLODE under the heat of the kiln. So, if you're not careful, you could open the kiln to find your precious little bowl as fragments of what it used to be.
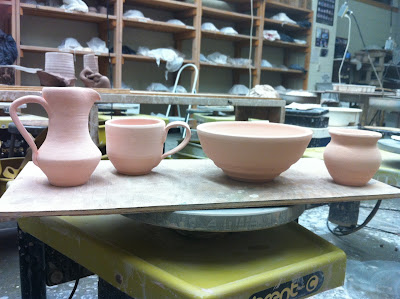
If you look below at the pieces that have been fired (now referred to as bisqueware), you can see a few differences in them from before. One obvious thing is the color. The earthy light brown is now replaced with a light pink. Of course results like this will also depend on the type of clay you decide to use. Another thing that you probably can't see from the photo is the size; these pieces shrunk about 30% of their original size because of all the moisture being dried up in the firing.
So, this leaves you at the stage where you glaze your piece! However, I want to save this step for its own actual post after I've glazed the pieces. Until then, tchau!
-j

Wow Josh, you must be good with your hands ;)
ReplyDeleteOhhh, he is!
ReplyDelete